My previous hide has been in use for two years and it is slowly starting to come apart. The few design flaws in it have also been nagging at my mind, especially with the spring season getting closer and closer every day. I decided to make a new top for my tested and well functioning base.
I started the project again by putting up the tent. This time in our livingroom, since my workshop is so full of stuff that there is simply no room to do anything there.

Next I checked the placements for the viewing- and photographyslits. To make sure I had the placements right, I placed a tripod and a lens in the tent:

I used a marker to draw vertical and horizontal lines around the lens so that I'd know where to cut the slits. I also placed the mesh that would come on the viewingslits in place. I attached the mesh loosely by its corners with pins:

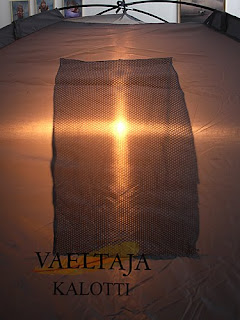
By using a small spotlight affixed to the tripod, I could see the outline of the mesh from the outside of the tent:
I used a ruler as a guide and using a sharp knife, cut the crossedslits for the lens and a rectangle shaped hole for viewing:

I then took the tent down and turned it inside out to fasten the mesh in smoothly and tightly in place with pins:

Next it was time to abuse my wifes sewingmachine. The biggest challenge was keeping all the extra material from getting tangled and sewn by accident:

After all the viewingholes had their mesh sewn into place, I measured the size of the rainflaps that I would need for each. I cut the pieces from tarp that was left over from making my previous hide. I sewed the rainflaps in place from their top, well above the openings in the tent:

I also sewed elasticbands to the bottom corners of the rainflaps. These will be used to tighten the flaps to the bottom of the tent:

The better naturephotographer of our family took a quick check of the viewholes and gave her approval to my design:

I used spraypaint to give the hide a camoflagecoloring. At the moment the hide is still waiting for the paint to dry, so I'll post a picture of the final product at a later time.
 I took the picture after I had set the hide up in preparation for the black grouse mating season that will be starting any day now. Obviously a greenish camo coloring does not blend in well with the white of the snow, but things look much better with some white camonetting:
 From a distance, the hide blends in with the landscape rather well.


